Published: 02/27/2024 - Author(s): Josh - Tag(s):
LED Wick Prototype for Fans
Making LED alternatives for Fans that are more faithful to the traditional look of a fire wick.
Existing LED Fans
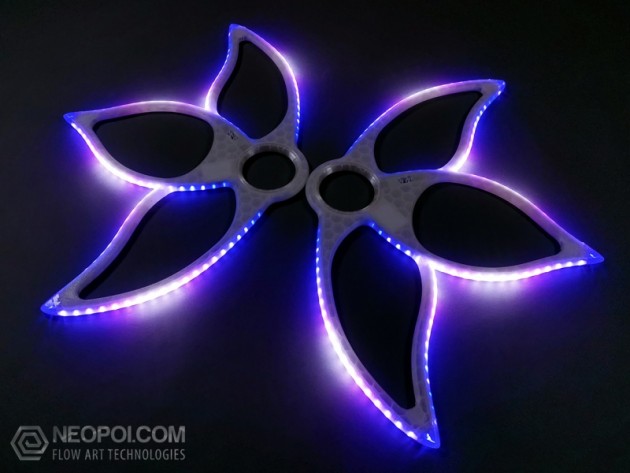
I’ve seen some existing LED fans in the wild that use continuous strip(s) going along some profile of the fan. To see some more examples of this, you can search online for Neo Flow Art’s or Sacred Flow Art’s LED Fans. These continuous strip LED styles are very cool for creating POV effects, and I’ll definitely try to recreate my own in the future. But we’re not talking about that in this blog. LEDs can never fully recreate the wispy and chaotic look of fire, but I’m curious to see how fans with individual LED “wicks” compare to the fire ones.
Pyrofox Compatible Glow Ends
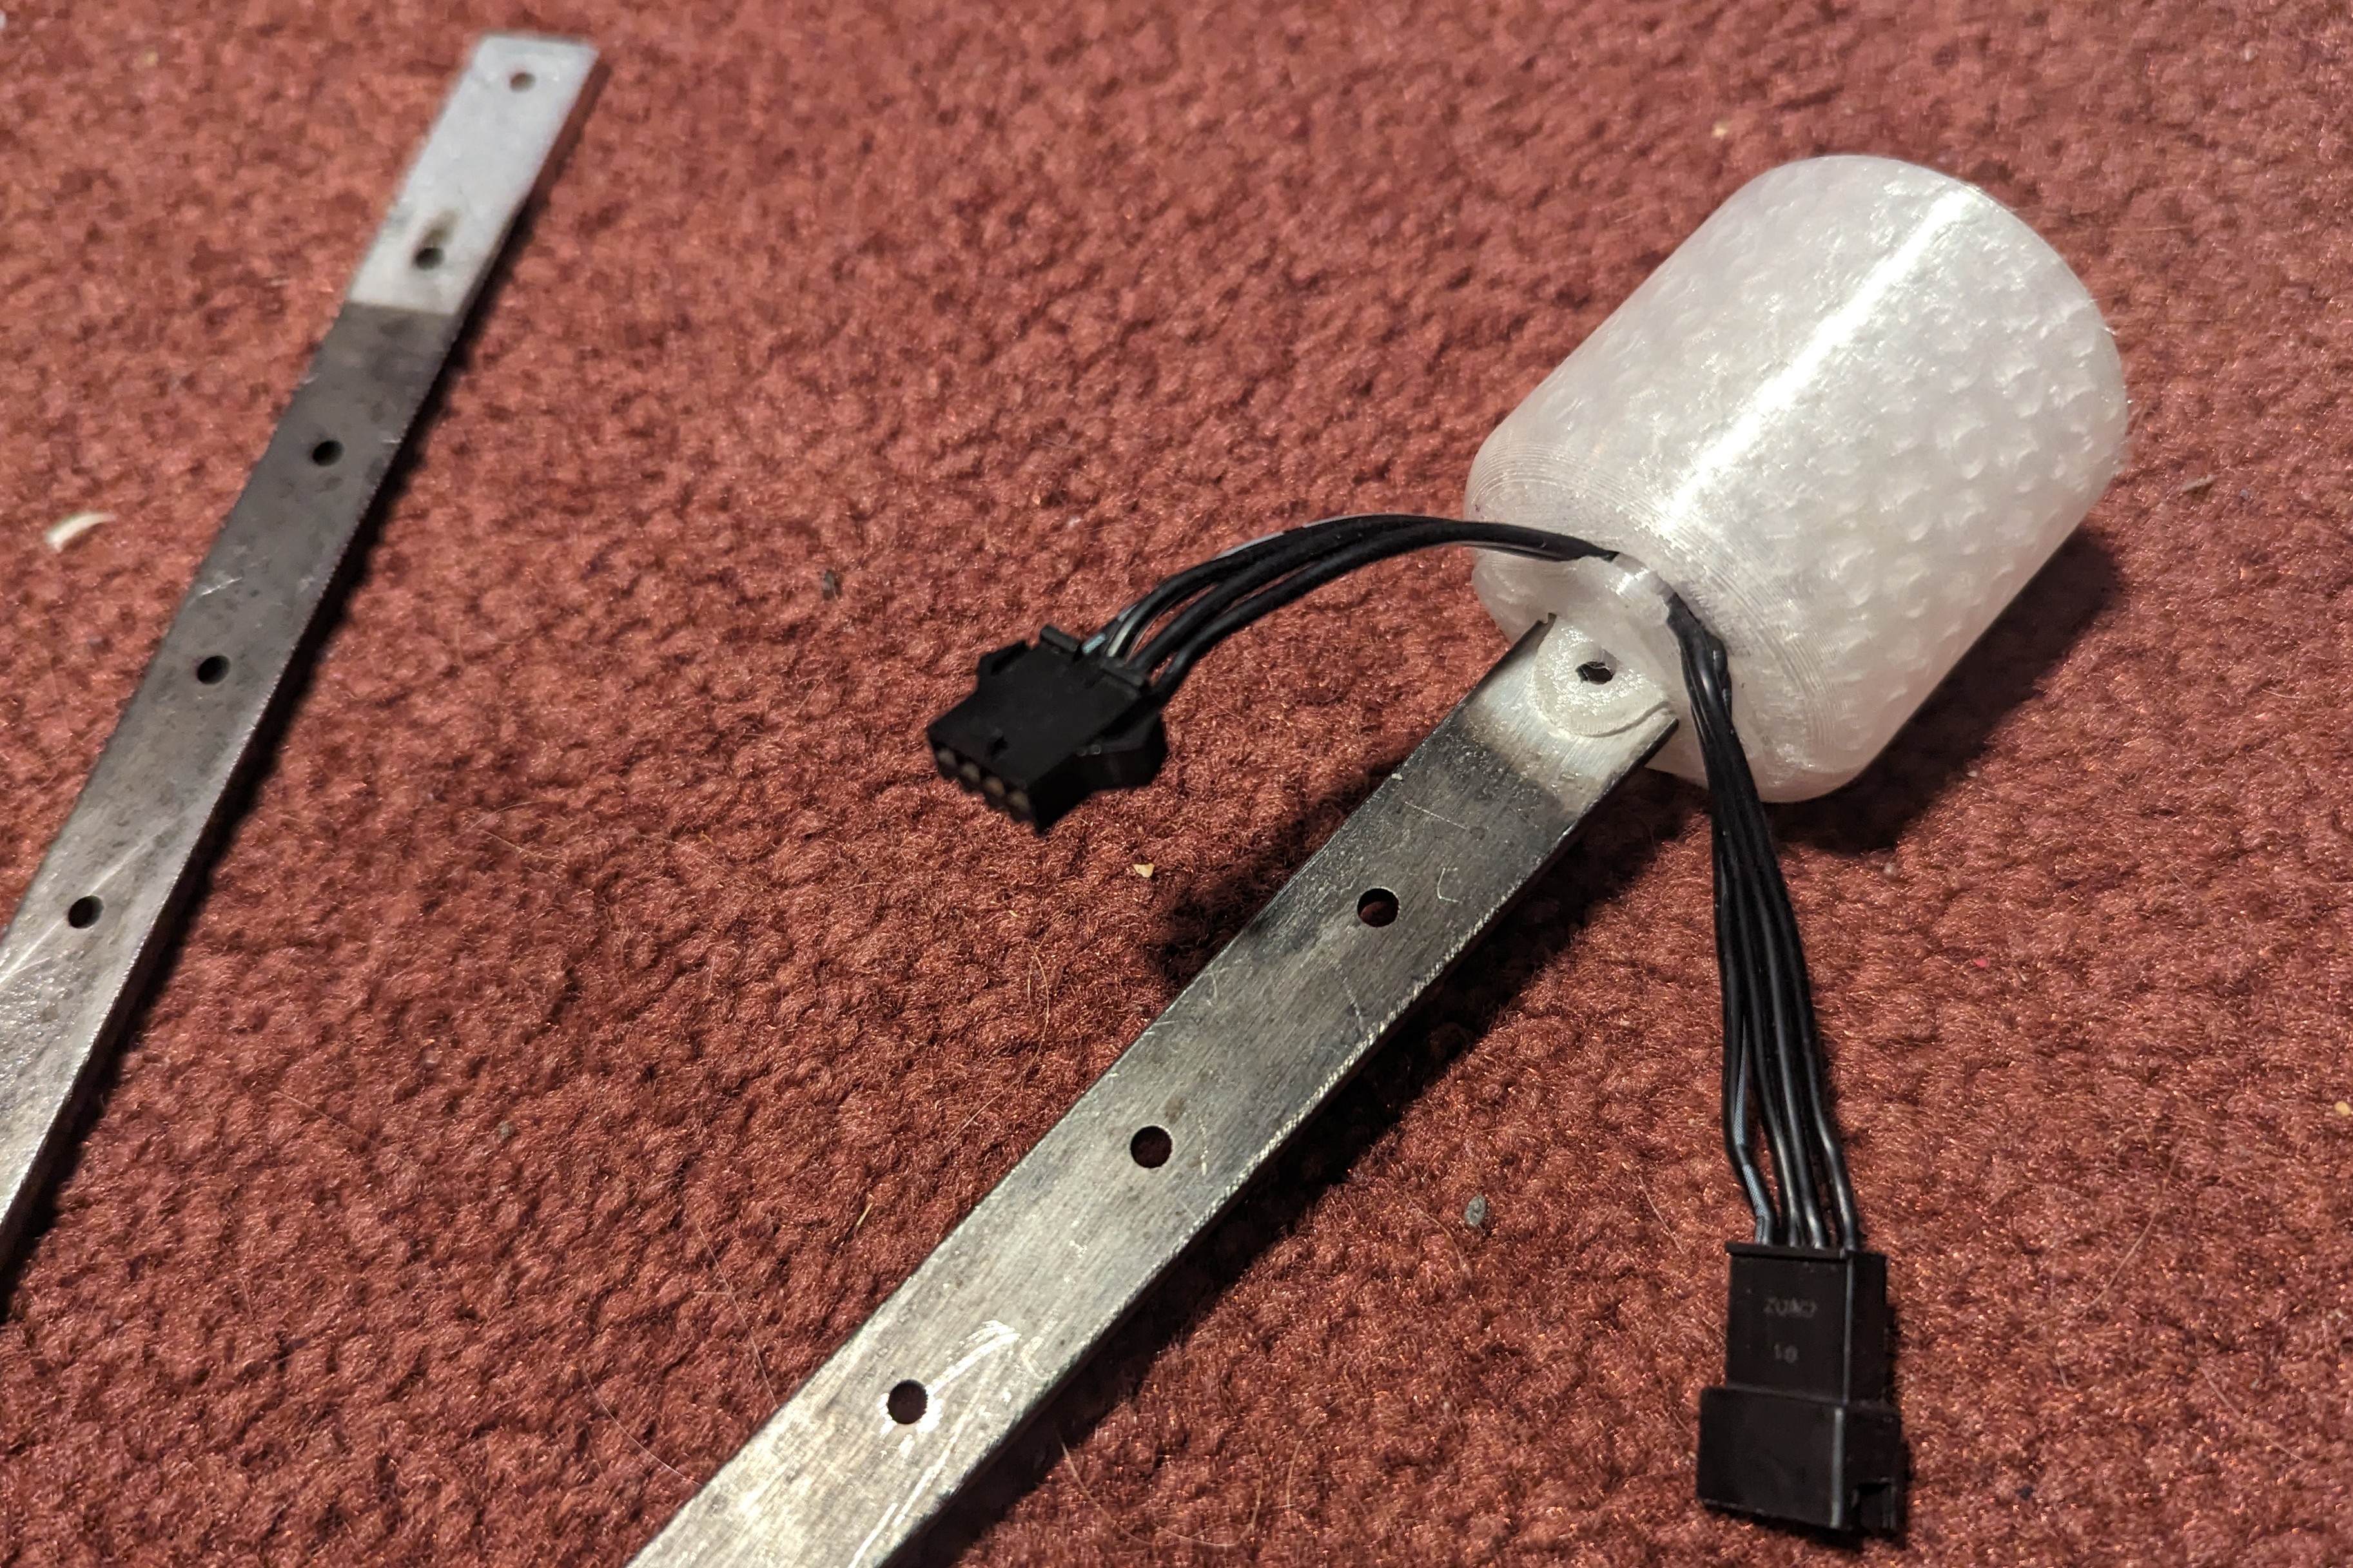
At Pyrofox, we have an interchangeable wick format for our fans. This offers a lot of advantages for both manufacturing the fans and the maintenance & customization of users’ prop. I’m able to leverage the same connection to make my own interchangeable LEDs wicks on the same prop I use for fire.
Design Thought Process
These are main characteristics I want from the LED wicks (in no particular order):
- Faithful to the look of traditional wicks.
- Light is contained and isolated to shapes similar to traditional wicks.
- Interchangeable on existing frames.
- Configurable LED types and wick quantity depending on the fan.
- Feasible using generally available material sources for makers.
- Easy & repeatable construction.
Size, Shape, and Form
The following image shows the outer casing, a plug on the bottom, and a slightly red shaded region showing where the LEDs rest. 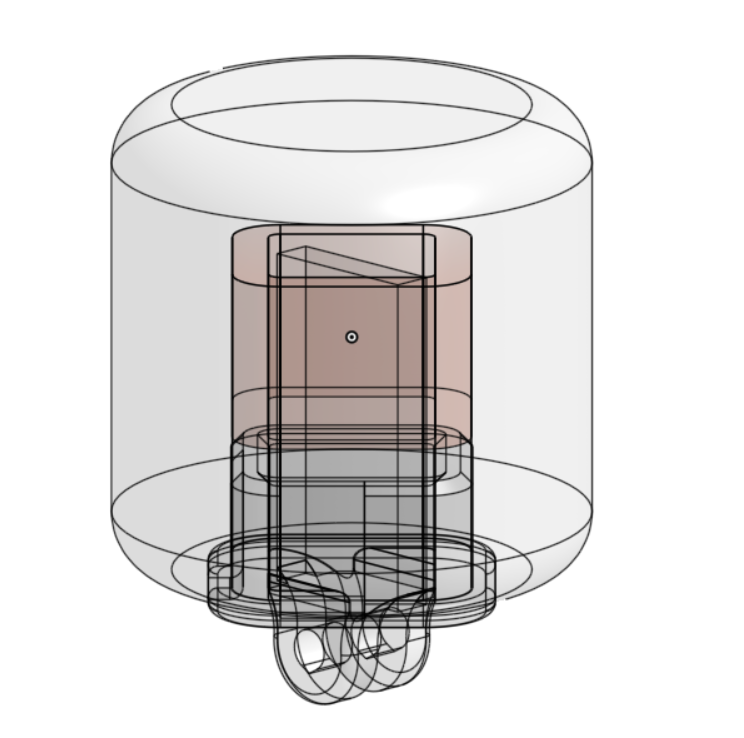
The idea behind aspects of the design are as follows:
- For manufacturing methods, I went with 3D printing for how flexible and quick it can create parts with internal geometry and flexible materials.
- For material, I went with clear TPU filament. Clear for hopefully obvious reasons. TPU because it is flexible and won’t shatter on impact and allows for deforming press fits in the design.
- For the outer walls, the desired size and shape are already decently defined by sampling fire wicks on existing fans.
- A cavity has to exist in the center so that it can slide onto a fan end to be interchangeable. To keep it from flying off when twirling, a screw hole is created to place a screw through the frame.
- Light should diffuse mostly evenly in all directions. Because the frame goes through the part, a cavity for a ring of LEDs has to exist.
- Other benefits of this design choice compared to - say lighting it through the part at the bottom - include protecting the LEDs without changing the form of the wick and being able to show different colors on the front and back of the fan.
- The LED cavity exits to the bottom.
- The plug for this cavity will disrupt the form and light diffusion of the wick. The bottom is the least viewed surface, so it is placed there to minimize it’s effect.
- This also allows us to print without support material as both the fan frame cavity and LED cavity are aligned and have no ceilings when printing from the upside-down orientation.
- The LED cavity is a diamond rather than a square or circle.
- A circle isn’t chosen since front/back or left/right color effects should be distinct. Instead of placing light blocking dividers, the LED angles are separate enough to be distinct without compromising too much on smooth gradient diffusion across them.
- The fan frame cavity is a rectangle. To increase the distance through the TPU for diffusion a diamond will place the LEDs closest to the center.
- To keep things together an over-fit plug will hold the LEDs and provide strain relief for wires through compression.
Integrating the LEDs
The initial thought process was to think about how the LEDs would receive power and signal. One idea was to have a microcontroller and battery on board to each wick. If I were to go this route, I thought the only viable battery for this would be a small lithium polymer battery. For my 6-wick fans, that would mean charging and protecting 12 separate lipo batteries. That doesn’t sit comfortable to me. Link to a Wikipedia article on Li-ion safety. The other negative aspects of that process to me is that the battery would likely block some of the LED light or increase the size of supporting structure(s) to the head.
In addition to this, the cost of batteries and microcontrollers would be extremely high. Microcontrollers for each wick would also pose a challenge syncing the colors.
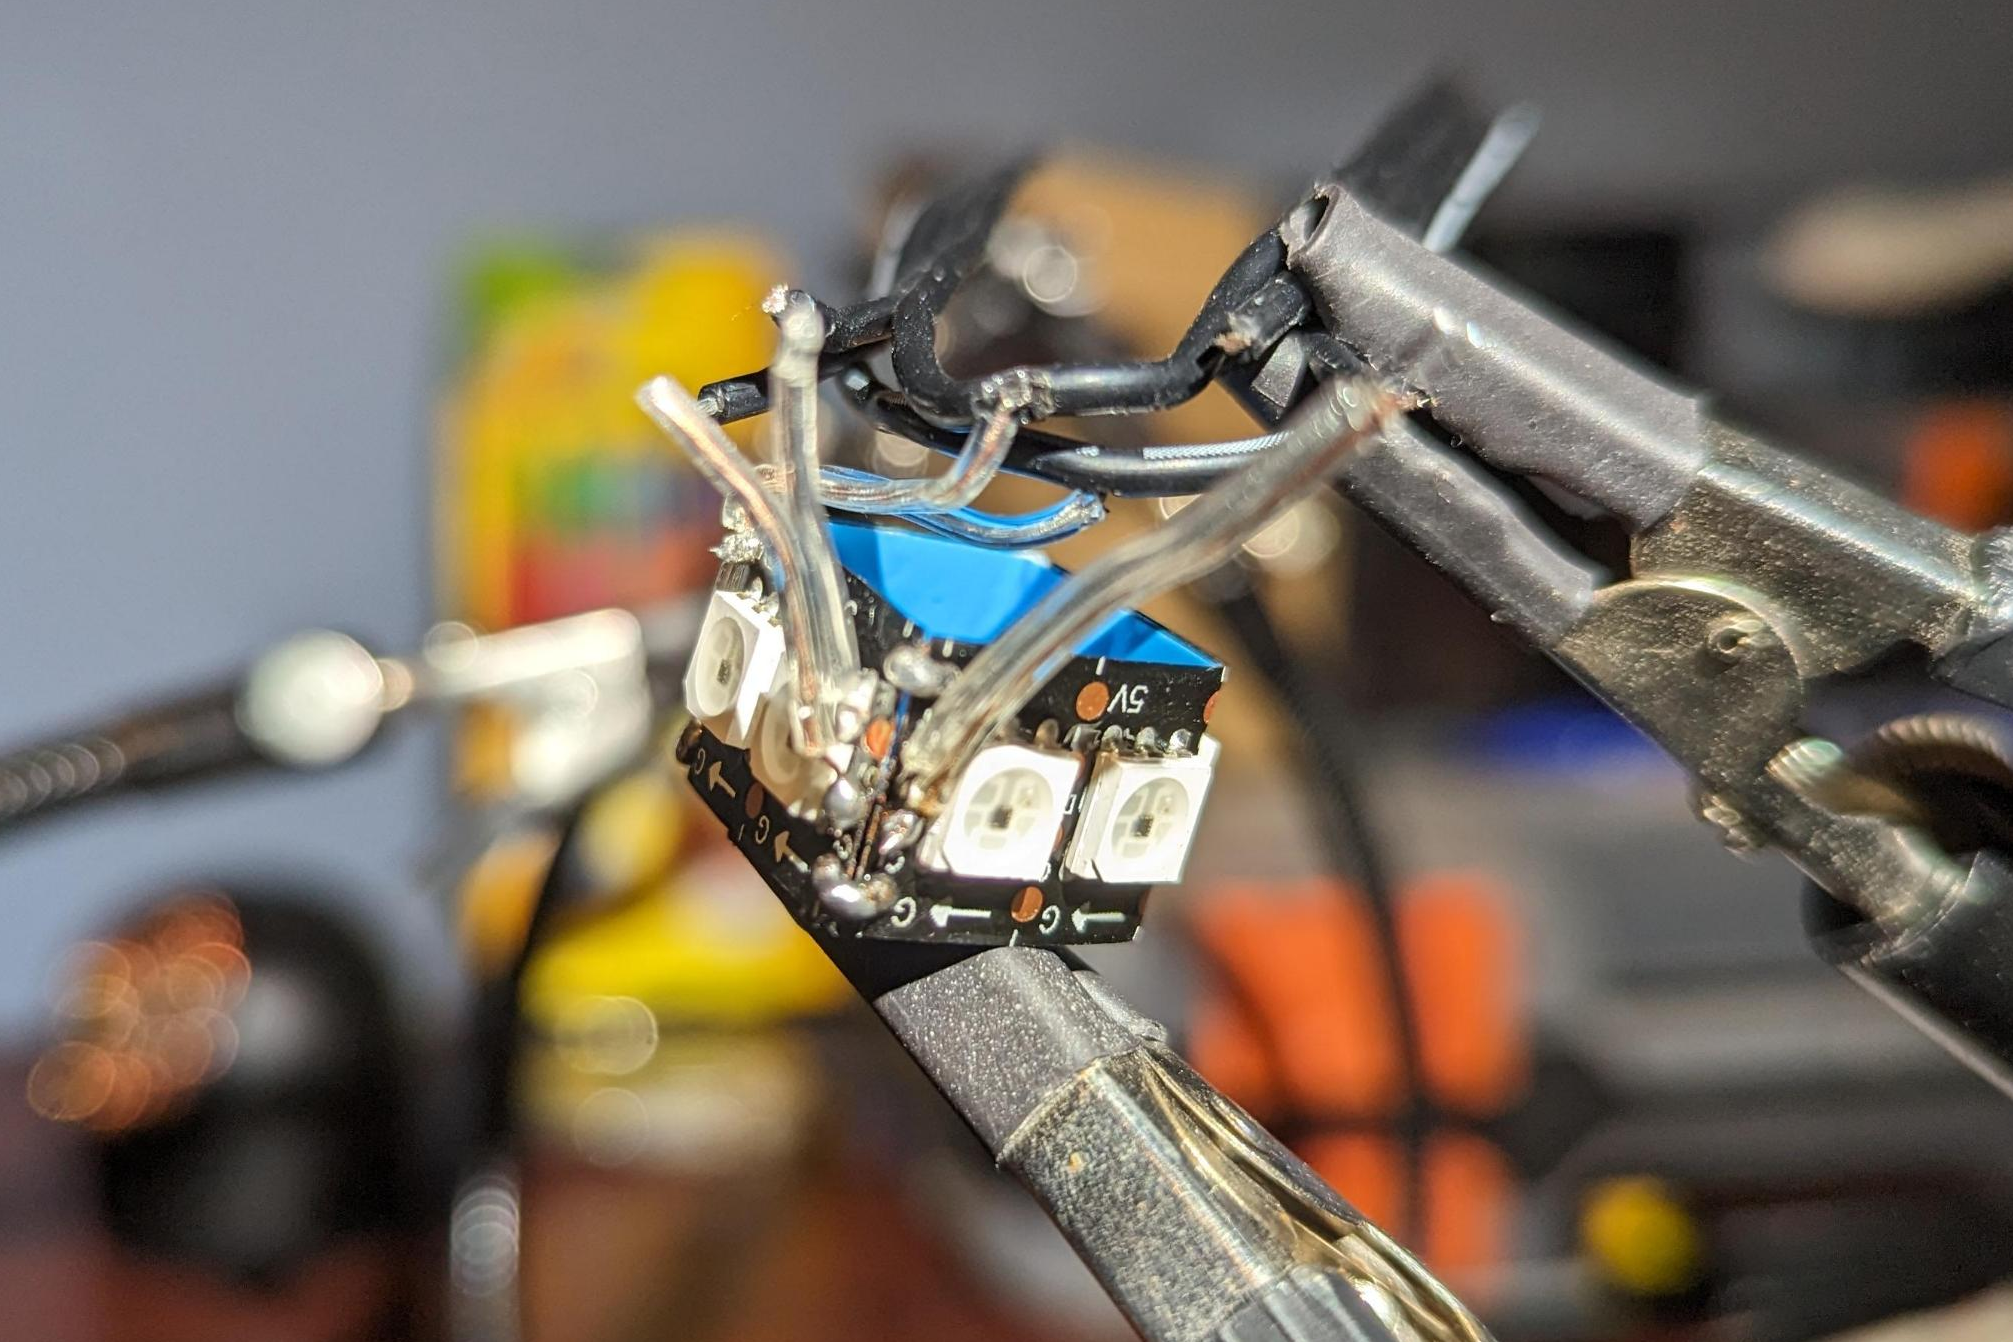
This concept and the great effort to create many individual small LED strips is the main reason why I think LED props are restricted to the continuous strip format. Although annoying to solder, these ends are basically fancy enclosures for a small strip of SK9822 LEDs that can be chained using custom crimped JST-SM connectors.
Hopefully not a premature optimization, but the LEDs are wired from the main wire using thinner clear wire as to not block light. To splice into the continuous power lines; I used a knife to remove insulation without cutting the wire. Then, to prevent shorts I covered the joint with nail polish. There’s probably a better method, but I used what was on hand (thanks Mom!).
Results
While talking about the project, we started to use the name “Fae Wispies” for it. We’ll probably officially name it something else in the future, but for now the name stuck around.
It’s always difficult to try and take faithful pictures of LEDs without overexposure, but I’ve attempted to adjust the camera settings to showcase the look as closely as I can (albeit with some overexposure still).
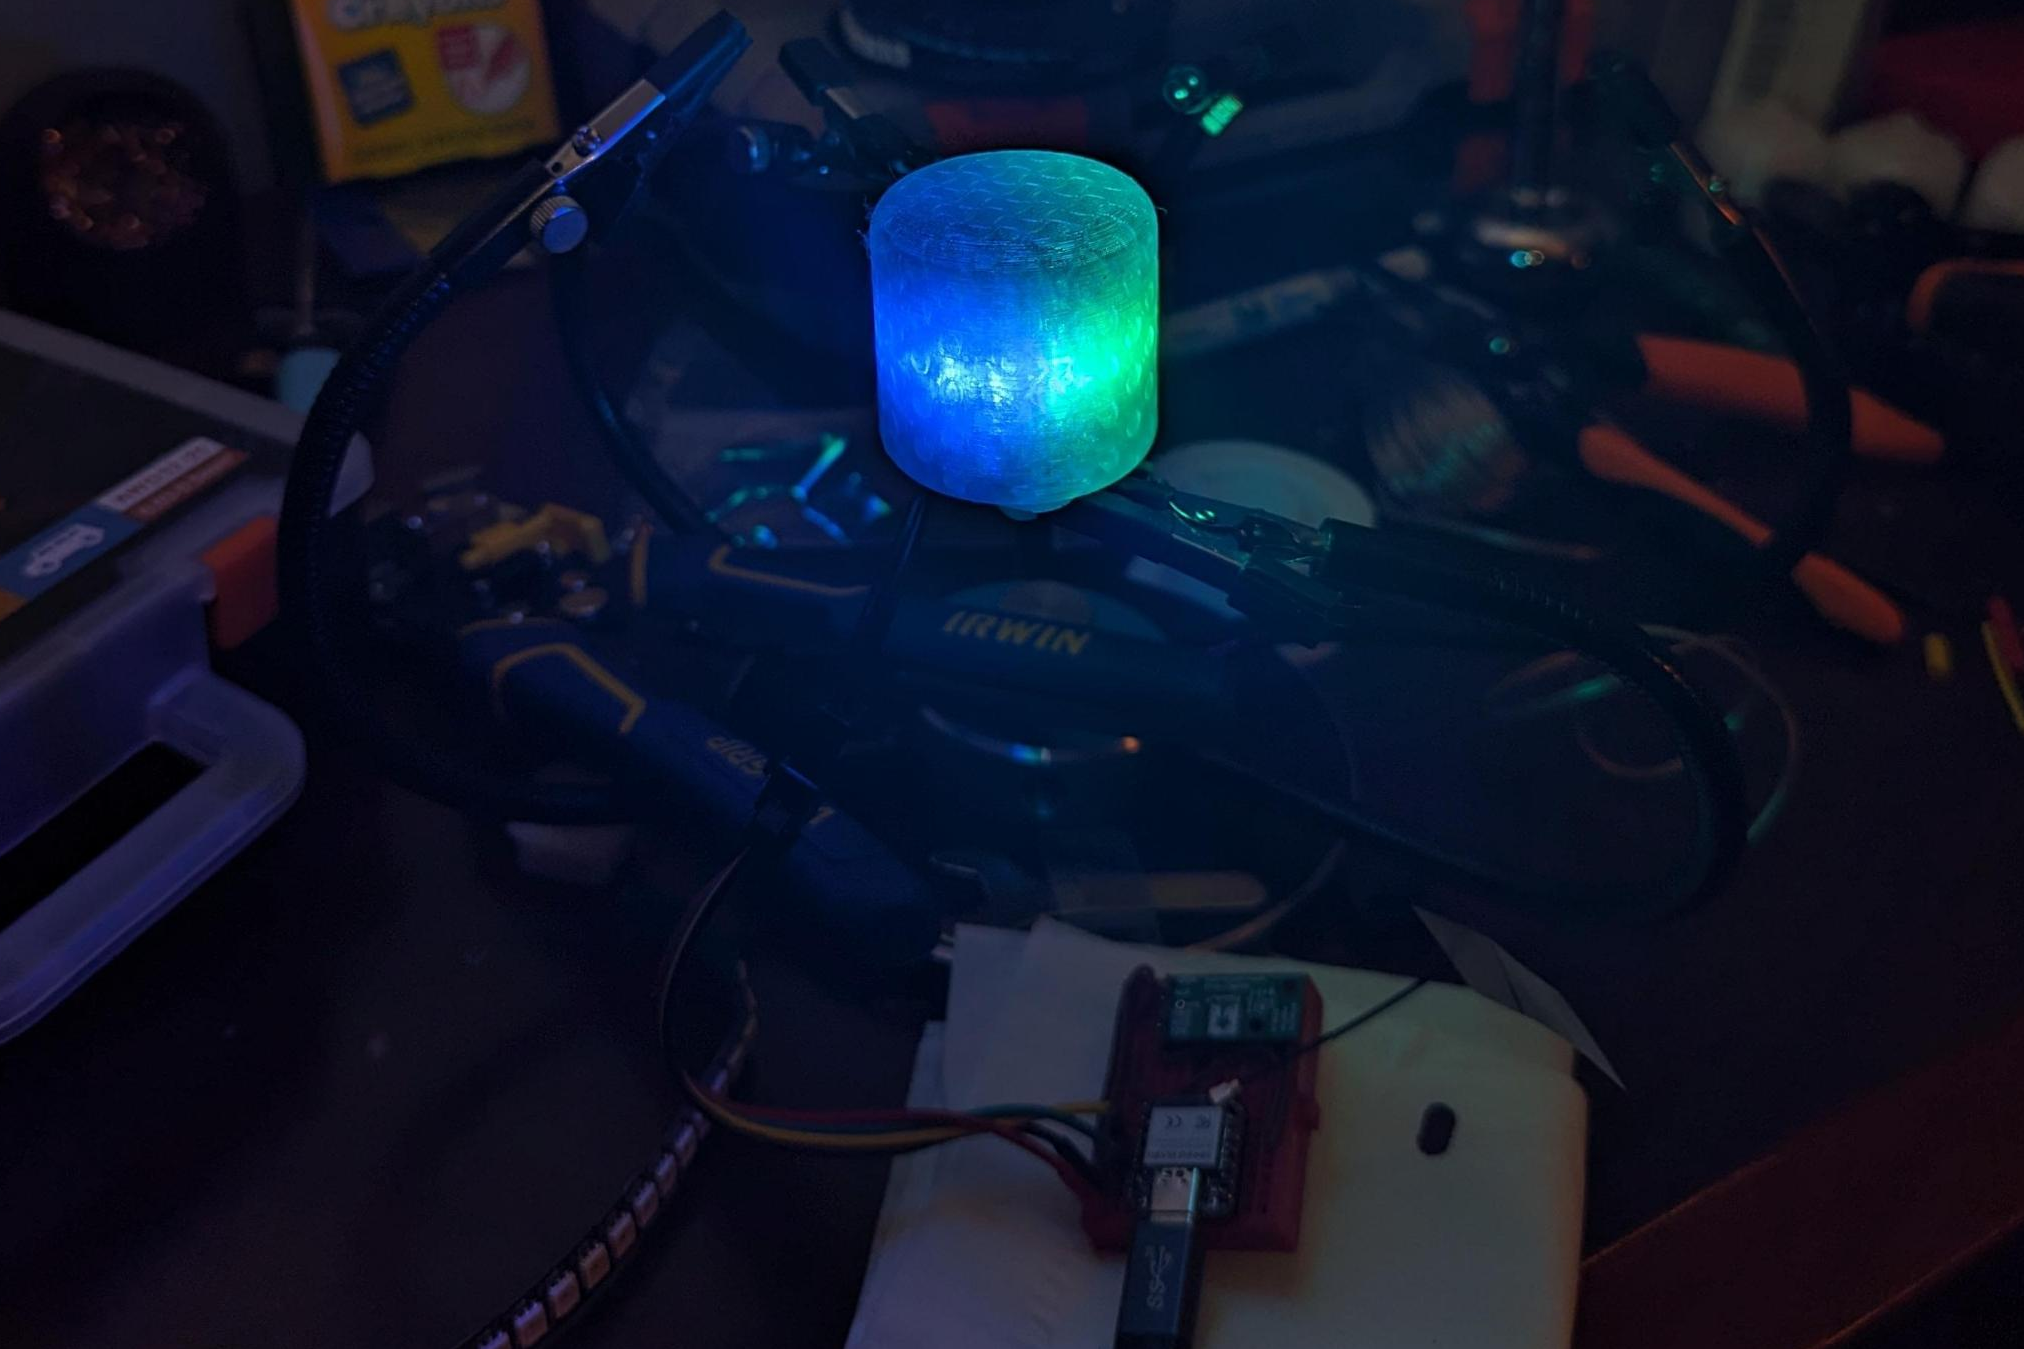
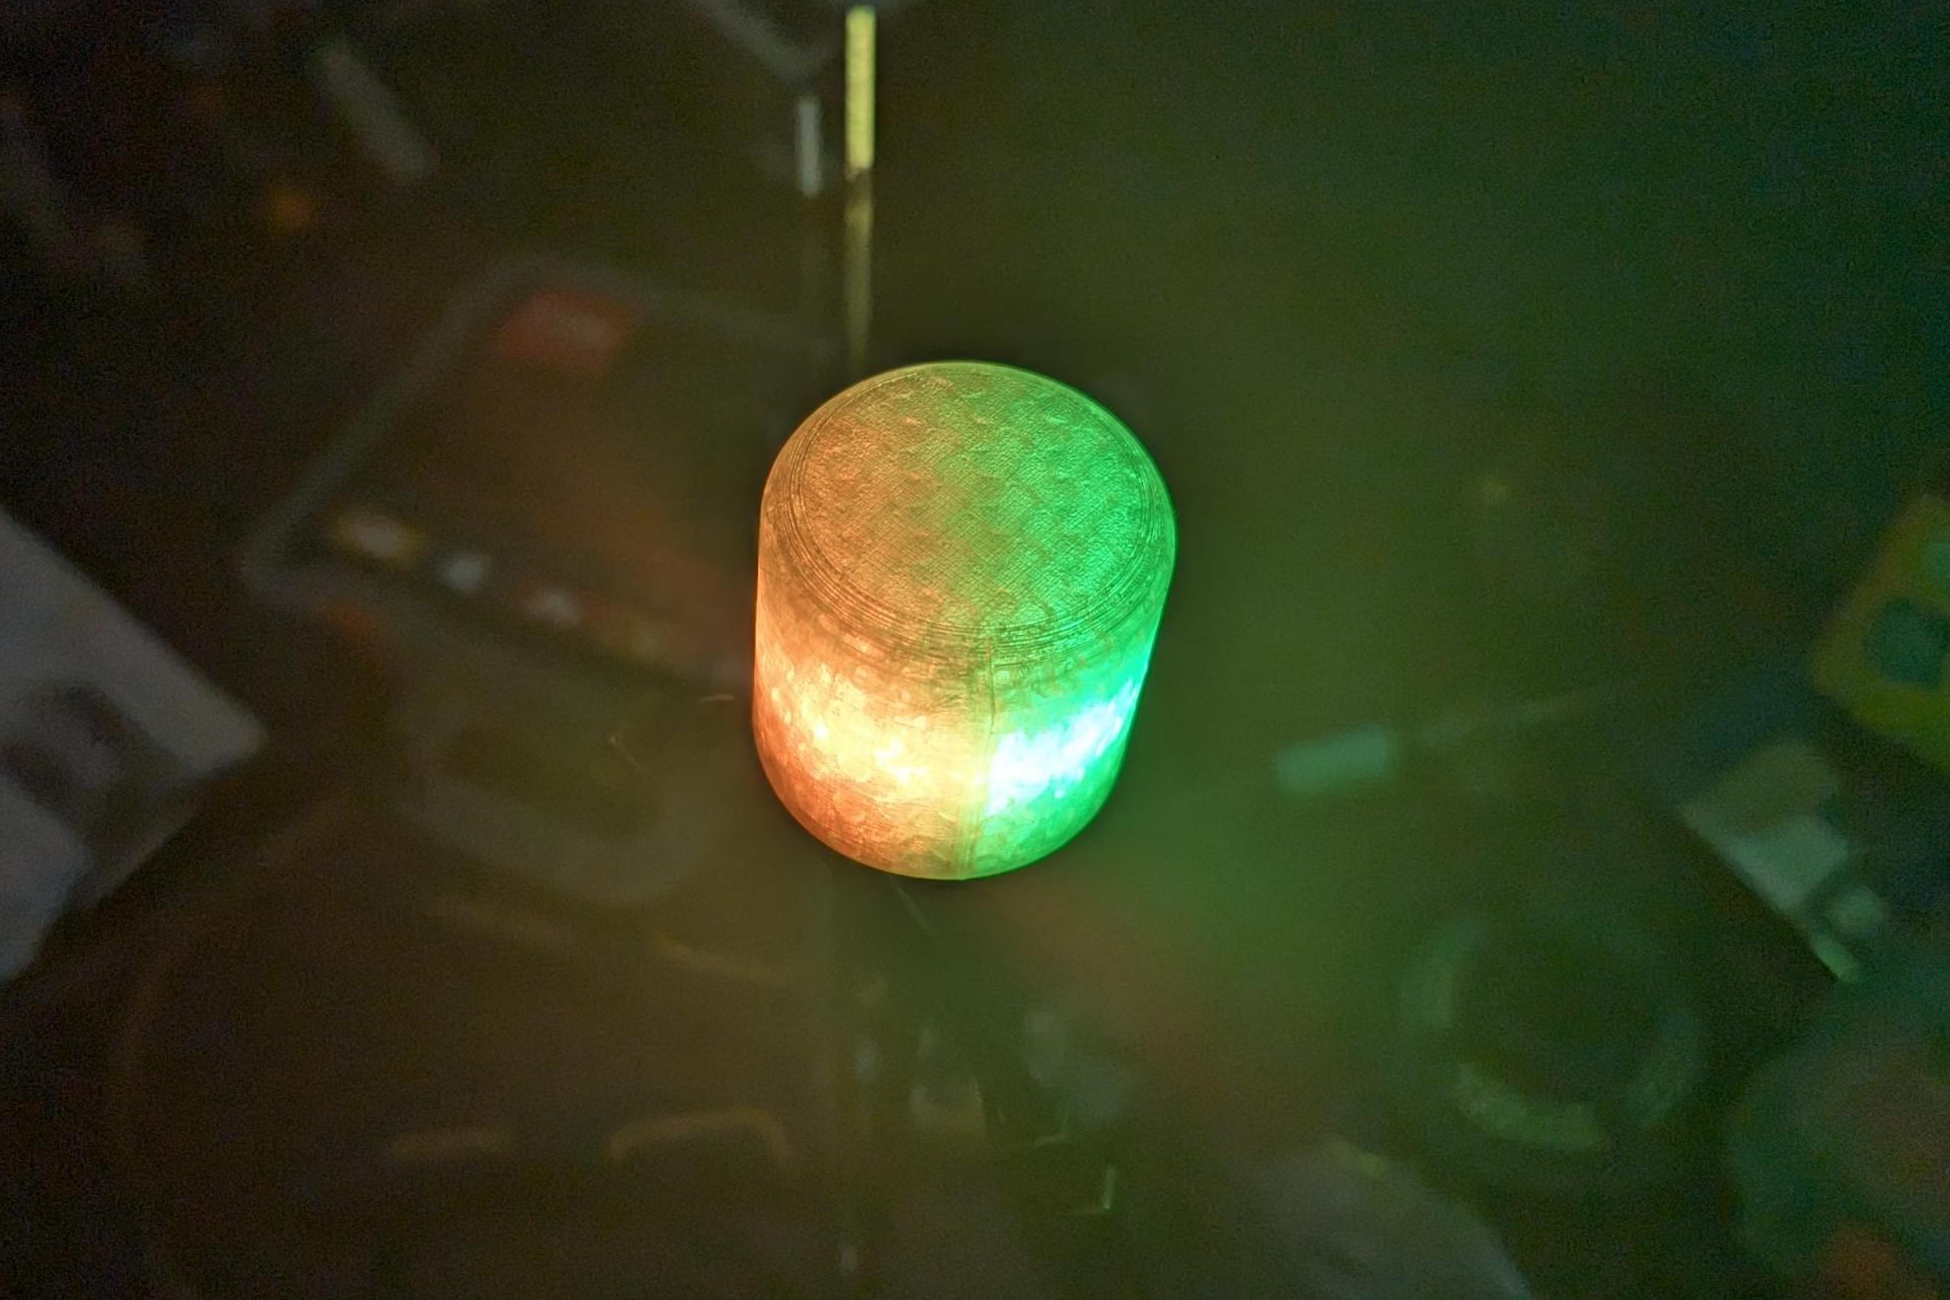
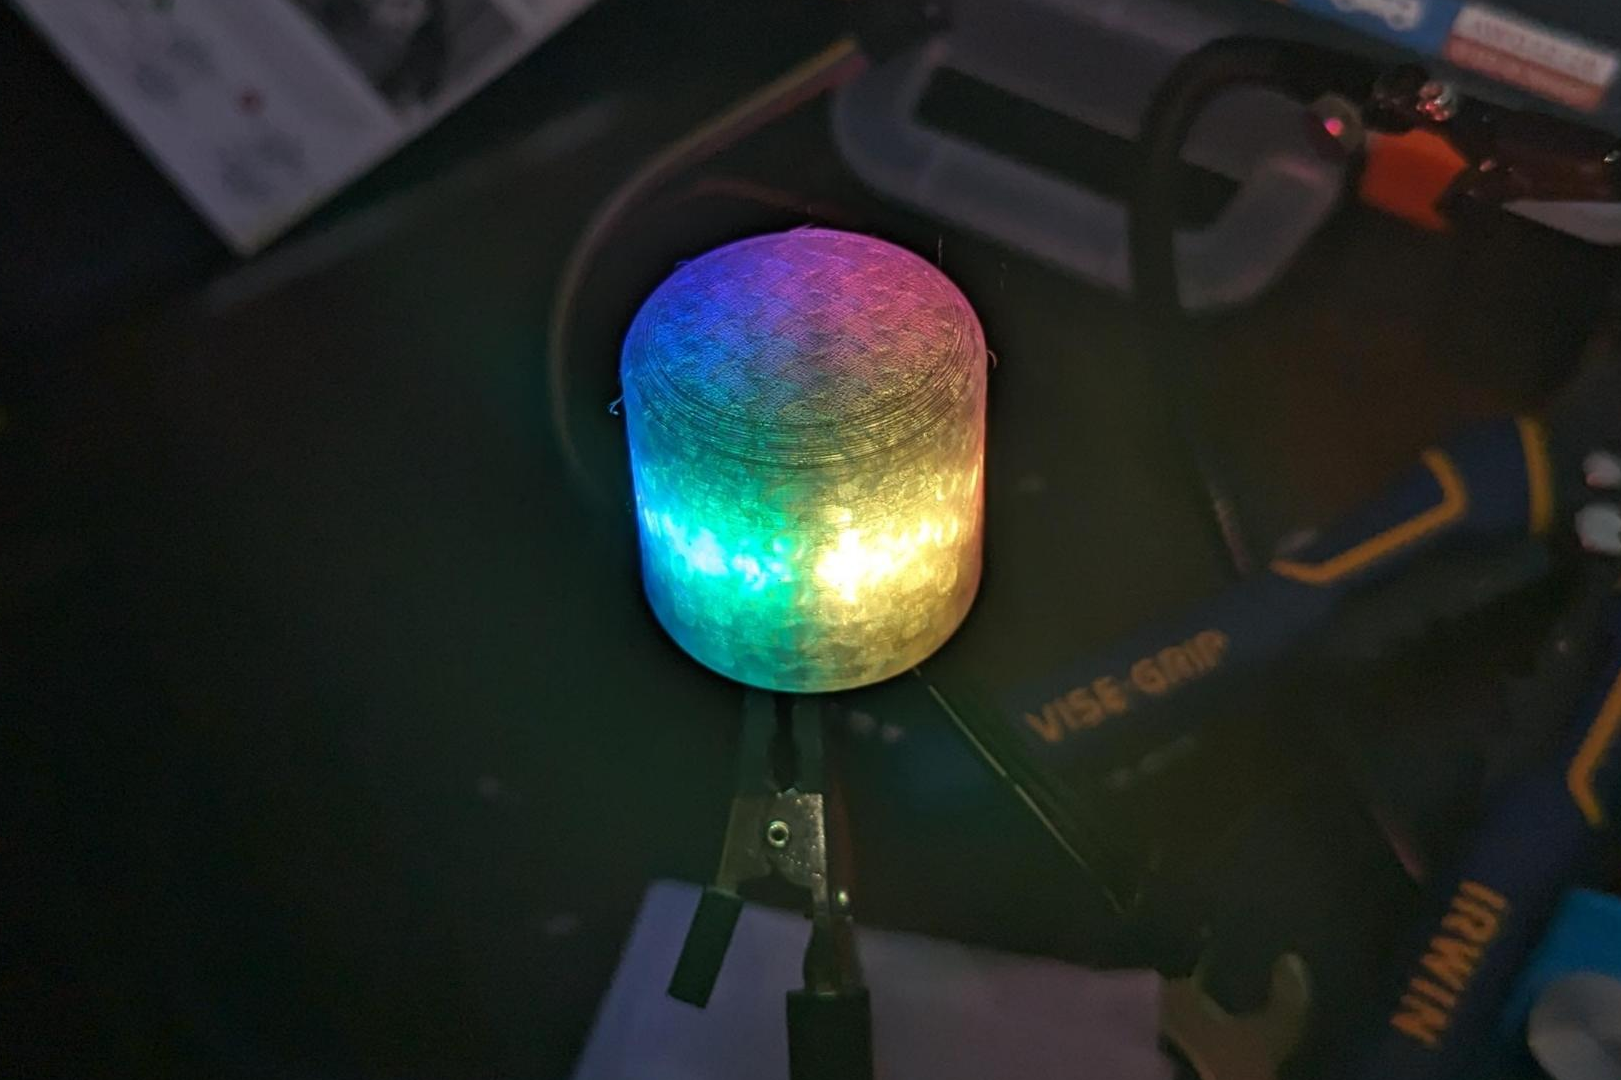
I’m very happy with the look of the wick. Even at half brightness it diffuses nicely and is plenty bright in a dark environment. I was surprised to not see any dark spots stemming from the wires inside (this may have been stemming from a premature optimization with the wiring and testing it with normal wiring is yet to be done). In addition to this, the color separation works really well and I’m excited to see a complete two sided fan with these LED ends and color changing effects.
What’s next?
- Making more!
- While one looks cool, the main goal is to replace all the wicks and see how well they look while spinning and performing isolations!
- Reducing construction difficulty.
- While soldering all the wires by hand onto a cut LED strip is very cheap, it can be very frustrating when a pad lifts or messing up stripping very small transparent wires. A custom flexible PCB with pads for the external wires and LED chips can streamline the creation and reduce inconsistencies.
- Building a carrier for the electronics.
- For these tests, I just used the test bed I use for testing the Fae Wisp Engine, in the future a separate power source and microcontroller enclosure to attach to fans.
- Durability experimentation.
- If fall pls no break.
- Color changing effects!
- Using Pyrofox’s Fae Wisp Engine

